
Introduction
There’s an old adage that says the ‘most important element’ of a pie is the injustice crust and grandma’s pie. It seldom goes wrong. A delicious buttery, crisp crust that works for sweet or savory pies. It contains butter and shortening and keeps the mixture cool so that the flakiness is maintained. This recipe can be used by anyone – novice or expert as it is simple and can be used irrespective of what pie filling one decides to use. Now, when is the last time you made a pie crust? Let’s get to it so that we can make one that will charm everyone each time!
Ingredients
– Pastry flour: 3 cups
– Shortening: 1/2 cup
– Cold butter: 1/2 cup, cubed
– Ice-cold water: 1/2 cup
– White vinegar: 1 tablespoon
– Salt: 1 teaspoon
Instructions
Putting together the Dry Ingredients
In a larger mixing bowl, sieve in the flour and combine with the salt. This will be helpful in making the crust light and the mixture uniform.
Cutting the Fats into the Mixture
Pour the cold butter and shortening in to the mixture of flour. With a pastry cutter or your hands, blend in until it has the feeling of a coarse crumb. It is important to keep the fats cold to avoid consistencies.
Adding Huge Quantities of Liquid
In a small bowl, the very cold water and vinegar are blended. Little by little add this mixture to the flour and fat, mixing with a fork to bring the dough together. Don’t mix the products too much, instead mix just enough for a ball to form.
Dividing and Rolling Out
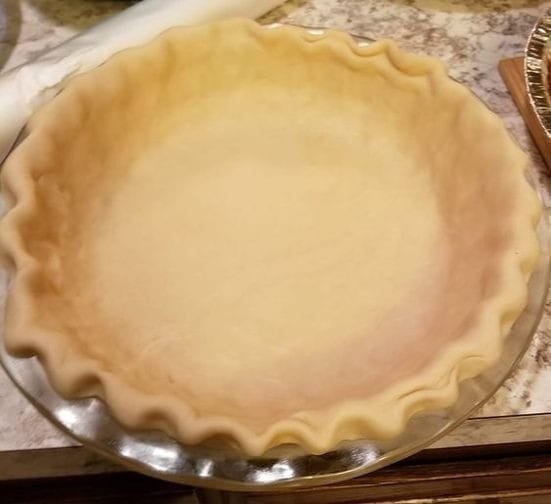
Divide the prepared dough in to two equal parts. On a floured board, take one half of the pastry and roll it out to about one-eighth an inch thin and slightly larger than the pie dish. Place the rolled out pastry in to the pie dish ensuring that the thick rim-edge hangs over the sides.
Putting the Pie together
When a single crips the pie is made, then the edges are cut and crimping done. In case of a double crusted pie, bring out the other portion of dough, roll it out and position it over your completed pie. Cut, then seam or pinch the edges to assist in sealing them together or use a fork.
NEXT PAGE
ADVERTISEMENT
