
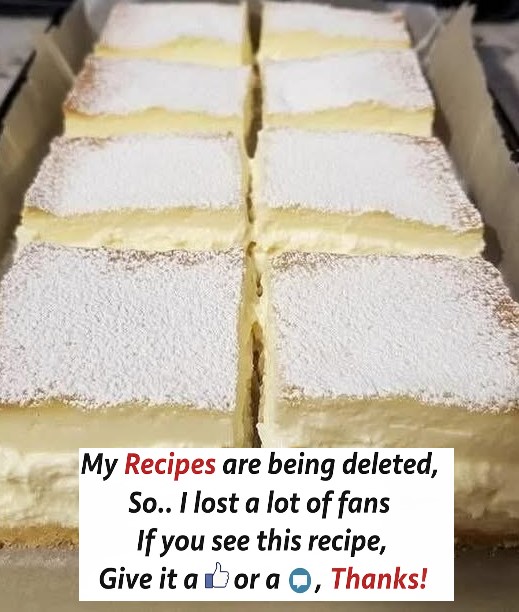
Creamy Vanilla Custard Squares: A Heavenly Dessert Experience 

Get ready to fall head over heels for one of the most irresistible desserts you’ll ever make!  Creamy Vanilla Custard Squares (also known as Vanilla Slices in Australia and New Zealand) are the ultimate comfort dessert that combines flaky, buttery puff pastry with silky-smooth vanilla custard. This dreamy treat will transport you straight to dessert heaven with every single bite!
Imagine this: layers of golden, crispy puff pastry sandwiching a thick, luscious vanilla custard that’s so creamy it practically melts on your tongue  , all topped with a cloud of fresh whipped cream and a delicate dusting of powdered sugar. It’s like eating a fluffy cloud of pure happiness!

Whether you’re preparing for a special celebration  , bringing a show-stopping dessert to a potluck, or simply treating yourself and your loved ones to something extraordinary, these Vanilla Custard Squares are guaranteed to steal the show and have everyone begging for the recipe!
Why You’ll Absolutely LOVE This Recipe 
Let me tell you why this recipe is about to become your new obsession! First off, it looks incredibly fancy and sophisticated – like something you’d pay big bucks for at a high-end bakery  – but here’s the secret: it’s actually surprisingly simple to make at home!
  Shhh, we won’t tell anyone how easy it was!
The texture combination is absolutely divine : the crispy, flaky pastry provides the most satisfying crunch, while the velvety custard delivers pure creaminess that makes your taste buds dance with joy!  And that vanilla flavor? Oh my goodness, it’s pure magic in every bite! The aroma alone will have your family rushing to the kitchen asking “What smells SO amazing?!”

What really makes this dessert special is how it strikes the perfect balance between being indulgent and light. It feels luxurious without being overly heavy, making it the ideal ending to any meal!  Plus, you can make most of it ahead of time, which means less stress when you’re entertaining guests!
The Magic Behind This Recipe 
The secret to these incredible custard squares lies in the perfect harmony of simple ingredients working together to create something truly spectacular! The puff pastry creates those gorgeous flaky layers that shatter delightfully with each bite  , while the homemade custard – oh, that custard! – is rich, creamy, and bursting with pure vanilla flavor that’ll make you weak in the knees!
Here’s the genius part: when you chill this dessert, the custard sets to the perfect consistency – not too firm, not too soft, but juuuust right!  It’s like the Goldilocks of desserts! The cold custard against the crispy pastry creates a temperature and texture contrast that’s absolutely heavenly!
And let’s talk about that fresh whipped cream topping for a moment!  It adds an extra layer of cloudlike softness that takes these squares from “wow” to “OMG WHERE HAS THIS BEEN ALL MY LIFE?!”
Essential Ingredients You’ll Need 

For the Puff Pastry Layers
You’ll need 2 sheets of puff pastry (about 17 ounces total) – and here’s where you can totally take a shortcut!  Store-bought puff pastry works absolutely beautifully for this recipe, saving you tons of time and effort. Look for all-butter puff pastry if you can find it – the flavor is chef’s kiss
 ! Just make sure to thaw it according to the package directions before using.
If you’re feeling adventurous and want to make homemade puff pastry, go for it!  It’s definitely more work, but some bakers swear by the superior flavor and texture. Either way, you’ll end up with a stunning dessert!
For the Dreamy Vanilla Custard 

This is where the magic happens, folks! The custard is the star of the show, so we’re using the good stuff:
Milk (4 cups) – Use whole milk for the richest, creamiest results!  This forms the base of your luscious custard. Don’t even think about using skim milk – we’re going for decadent here!
Eggs (8 large eggs, separated) – Yes, you read that right – EIGHT eggs!  The yolks create that beautiful golden color and rich flavor, while the whites (whipped to fluffy peaks) make the custard extra light and airy! It’s like custard on a cloud!
Granulated sugar (1½ cups) – This sweetens the custard to perfection!  The sugar also helps create that beautiful, glossy texture we’re after.
All-purpose flour (1¼ cups) – This is our thickening agent that transforms liquid into that dreamy, spoonable custard! Some recipes use cornstarch or custard powder, but flour works wonderfully!
Pure vanilla extract (3 teaspoons) – Don’t skimp on the vanilla, friends!  This is what gives the custard that gorgeous, aromatic flavor that makes this dessert so irresistible. Use the real stuff, not imitation – your taste buds will thank you!
Optional: Rum (2 tablespoons) – This is totally optional, but a little splash of rum cuts through any egginess and adds a sophisticated depth of flavor!  Feel free to skip it if you’re serving to kids or prefer to keep it alcohol-free!
For the Whipped Cream Topping
Heavy whipping cream (2 cups, well-chilled) – This gets whipped into billowy clouds of deliciousness! Make sure it’s super cold – straight from the fridge is perfect!
Powdered sugar (2-3 tablespoons) – Just a touch of sweetness to make that whipped cream even more amazing! Plus, you’ll want extra for dusting the top at the end! 
Step-by-Step Instructions 

Step 1: Prepare the Puff Pastry Magic
First things first – preheat your oven to 350°F (175°C)!  Line two baking sheets with parchment paper. This is important because we don’t want our beautiful pastry sticking!
Place each sheet of thawed puff pastry on a prepared baking sheet. Now here’s a crucial step: grab a fork and prick the pastry ALL over – and I mean really go to town on it!  This prevents the pastry from puffing up too much and creating huge air pockets. We want it to stay relatively flat so it creates perfect layers for our custard sandwich!
Pop those beauties into the oven and bake for about 10 minutes, until they turn a gorgeous golden brown color! Your kitchen will start smelling absolutely incredible at this point! When they’re done, remove them from the oven and let them cool completely on wire racks. Patience, my friend! We need them totally cool before assembly! 
Pro tip: Some bakers like to place another baking sheet on top of the pastry while it bakes to keep it extra flat. This totally works! Just make sure there’s parchment paper between the pastry and the top pan!
Step 2: Create That Heavenly Custard 
Time to make the star of the show – the custard! This is where things get exciting!
Pour 3 cups of milk into a medium saucepan and bring it to a gentle boil over medium heat. Keep an eye on it – milk can boil over quickly! 
While that’s heating up, grab a large mixing bowl and let’s work some magic! Add your 8 egg yolks (save those whites – we’ll need them soon!) and the granulated sugar. Using a whisk or electric mixer, beat them together until the mixture becomes pale, fluffy, and ribbony!  This usually takes about 2-3 minutes with an electric mixer. You’ll know it’s ready when it’s light yellow and increased in volume!
Now add the flour, vanilla extract, rum (if using), and the remaining 1 cup of cold milk to your egg mixture. Whisk it all together until super smooth with no lumps! This is important!
Here comes the crucial part – tempering! This sounds fancy but it’s actually simple!  When your milk is boiling, you need to slowly add the egg mixture to it. And I mean SLOWLY! Ladle a little bit of hot milk into the egg mixture while whisking constantly. This gradually warms up the eggs without scrambling them! Keep adding hot milk little by little until you’ve incorporated about half of it, whisking constantly! Your arm might get tired but it’s SO worth it!
Now pour your warmed egg mixture back into the saucepan with the remaining hot milk. Return it to medium heat and whisk constantly – and I mean CONSTANTLY! – for about 2-3 minutes until the mixture thickens beautifully!  It should become really thick – much thicker than regular pudding! We want it to set firm when chilled, so don’t stop whisking until it’s nice and thick! You should be able to see the bottom of the pan when you draw your whisk through it!
Remove from heat and set aside. Take a deep breath – the hard part is done! 
Step 3: Whip Those Egg Whites to Fluffy Perfection!
Remember those 8 egg whites we set aside? Time for them to shine!
In a completely clean, dry bowl (this is important!), use an electric mixer to beat the egg whites until they form stiff, glossy peaks!  This means when you lift the beaters, the peaks stand straight up without drooping. This usually takes 3-5 minutes on medium-high speed.
Now gently fold these fluffy clouds into your warm custard mixture!  Use a spatula and fold gently – we don’t want to deflate all those beautiful air bubbles we just created! The egg whites make the custard extra light and airy – it’s pure genius!
Step 4: Assembly Time – Let’s Build This Beauty! 
Get a 9×13 inch baking dish ready! This is where the magic happens!
Take one of your cooled puff pastry sheets and place it in the bottom of the dish. If it’s a little too big, you can trim it to fit perfectly!
Now pour all of that gorgeous, fluffy custard over the pastry and spread it out evenly with a spatula!  Make sure it reaches all the corners! This is going to look SO pretty!
Pop the whole thing into the refrigerator and let it chill for 1-2 hours until the custard is cool and set!  This is a great time to clean up your kitchen, call a friend
  , or just relax! You deserve it!
Step 5: The Whipped Cream Layer!
Once your custard is nicely set and chilled, it’s time for the whipped cream!
Pour your ice-cold heavy cream into a large bowl (make sure the bowl and beaters are cold too – pop them in the freezer for 10 minutes if you have time! ). Add 2 tablespoons of powdered sugar and beat with an electric mixer on medium-high speed until stiff peaks form! This usually takes 3-4 minutes. You’ll know it’s ready when it’s thick, fluffy, and holds its shape!
Spread this cloud of deliciousness evenly over your chilled custard layer! Try to make it as smooth and even as possible – we want those beautiful layers to show when we cut it!
Step 6: The Final Pastry Layer!
Now for the clever part! Take your second sheet of baked puff pastry and cut it into 15 squares before placing them on top!  Why? Because this makes serving SO much easier later! You just cut between the pastry squares instead of trying to saw through the whole thing! Genius, right?

Carefully place each square on top of the whipped cream layer, arranging them in a nice pattern. It’s like putting together a delicious puzzle! 
Return the whole beautiful creation to the refrigerator and let it chill for at least 2 more hours, or even better – overnight!  This allows all the layers to set perfectly and the flavors to meld together!
Step 7: The Grand Finale! 
Right before serving, dust the top generously with powdered sugar! Use a fine-mesh sieve to create that gorgeous, professional-looking snowy finish! It’s like giving your dessert a beautiful winter coat! 
Cut into squares (following those pre-cut lines in the top layer!) and serve! Watch as people’s eyes light up when they see those beautiful layers!
Serving Suggestions
These Vanilla Custard Squares are absolutely stunning on their own, but here are some ways to take them to the next level! 
Serve them with fresh berries 
 – raspberries, strawberries, or blueberries add a gorgeous pop of color and a tart contrast to the sweet custard! Plus, they look SO pretty!
Drizzle with chocolate or caramel sauce 
 for an extra indulgent touch! Why not? You only live once!
Add a sprig of fresh mint  on top for a restaurant-quality presentation that’ll make your guests say “WOW!”
Pair with a cup of coffee or tea 
 for the perfect afternoon treat! These squares are absolutely divine with a hot beverage!
Storage Tips 
Store your Custard Squares in an airtight container in the refrigerator for up to 3-4 days!  The pastry will soften slightly over time, but they’ll still be absolutely delicious!
Important note: These don’t freeze well!  The custard can separate and get watery when thawed, and the texture just isn’t the same. Trust me on this one – just make them fresh and enjoy them within a few days! They probably won’t last that long anyway because they’re SO good!
Tips for Perfect Custard Squares Every Time!
Keep everything cold! When making whipped cream, cold is your best friend! Cold bowl, cold beaters, cold cream = perfect whipped cream every time!
Don’t rush the chilling time! I know it’s hard to wait when something smells this good, but proper chilling is essential for clean cuts and perfect texture! Patience is a virtue, my friends! 
Use a sharp knife! When cutting, use a long, sharp knife and wipe it clean between cuts for the prettiest slices!
Prevent lumpy custard! Keep whisking constantly while cooking the custard, and if you do get a few lumps, you can strain the custard through a fine-mesh sieve! Problem solved! 
Prick that pastry! Don’t forget to thoroughly prick the puff pastry before baking – this is crucial for keeping it relatively flat!
NEXT PAGE…
ADVERTISEMENT
ADVERTISEMENT
